Follow these instructions to remove old valve and install new B141B repair kit.
Tools Needed:
• Phillips screwdriver
• 3/8” and 5/8” wrenches or adjustable wrench
1. Use a phillips head screwdriver and a 3/8” wrench to remove the spray lever from the tool.

2. Use the 5/8” wrench to loosen and remove the valve. Remove the old stainless steel washer, white plastic washer, ball bearing, and spring.

3. Insert the new spring first, then the ball bearing, then the white plastic washer with the lip side facing the ball bearing.

4. Insert two of the stainless steel washers. NOTE: If the valve is still leaking after it is re-assembled, insert the third washer

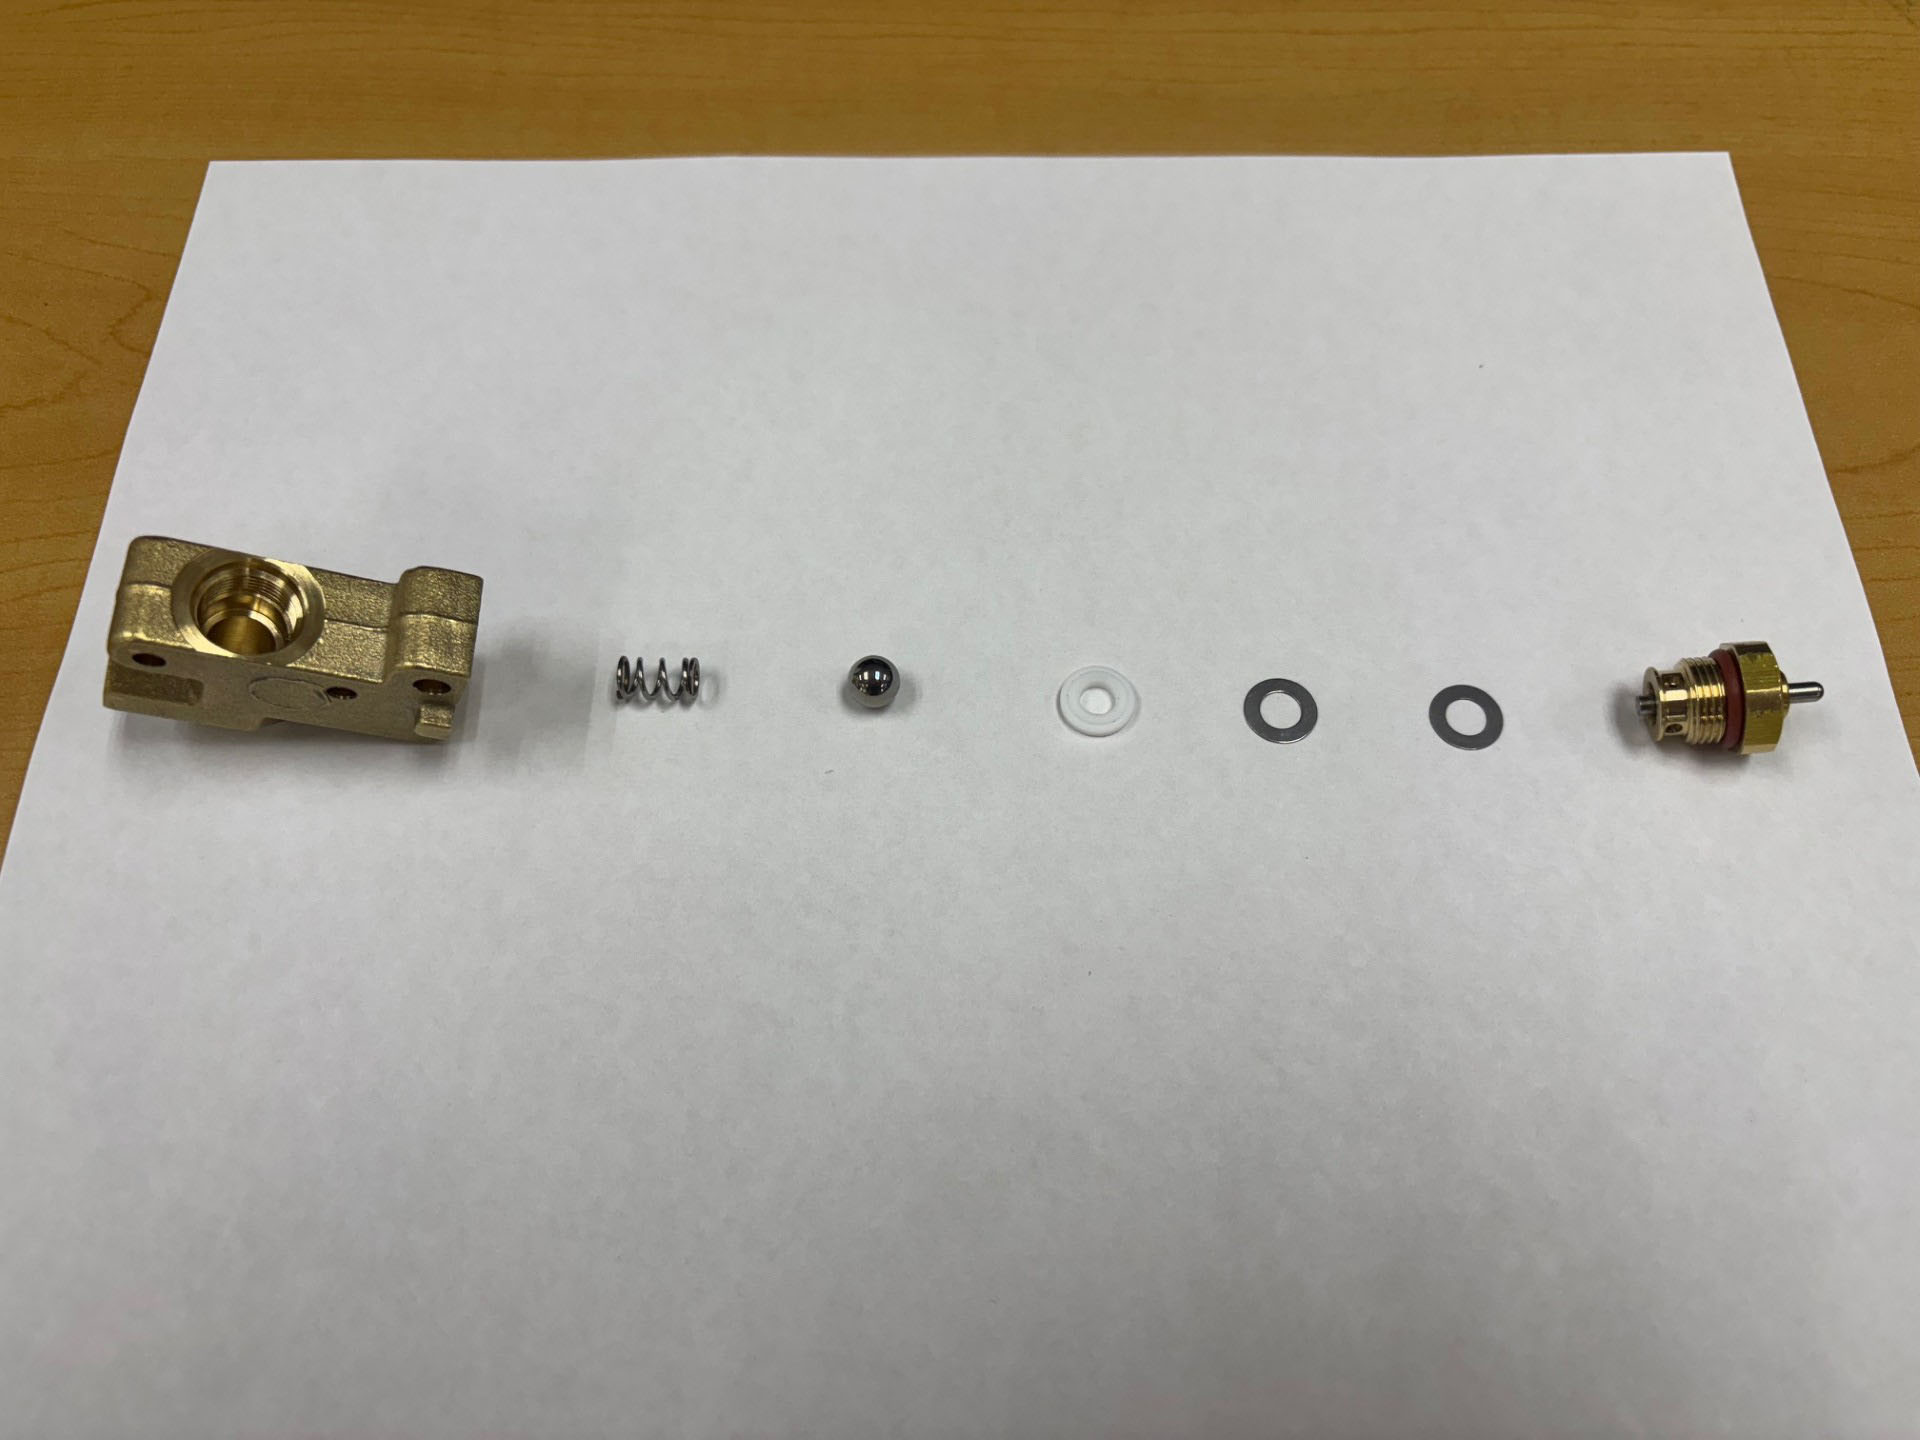
The above image shows the order the valve components should be installed.
5. Thread the new valve into place and tighten with 5/8” wrench.

6. Put the spray lever in place and insert the holding screw. Tighten the nut with the 3/8” wrench while holding the screw in place with the phillips head screwdriver.
